Posts Tagged ‘anatomy’

Eye Model Cake

Monday, February 22nd, 2016

eye-model-cake

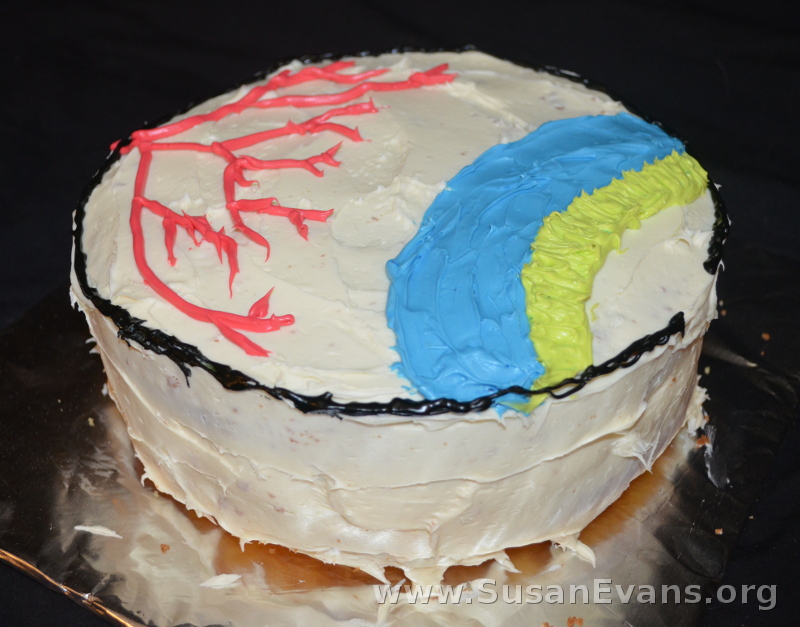
When you are studying the eye in human anatomy, why not make an eye model cake? First you will need to bake a circular cake with two baking tins. I recommend yellow cake with strawberry jelly between the two layers. (Don’t try to place jelly in the middle until the cake has completely cooled!)

How to Decorate an Eye Model Cake

  1. Frost the cake with white frosting.
  2. Open another bucket of vanilla frosting and divide it into four bowls, using food coloring to get the colors you want. (I only used three bowls: one for red frosting, one for blue, and one for green. I had a tube of black frosting left over from an Ugly Sweater Cookie Kit from Christmas, so I used that for the black.)
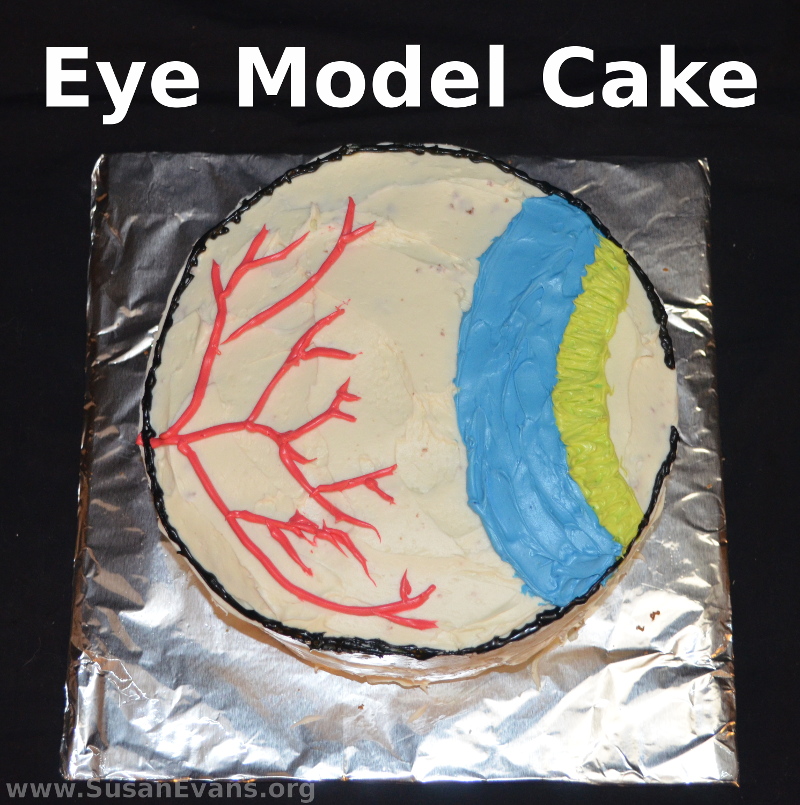
  3. Spread the blue frosting like a rainbow, and the green frosting next to it. The blue would represent the ciliary body, and the green the iris. Leave the lens white.
  4. Put the red frosting into a Ziplock bag and cut a hole in the corner. Make veins and arteries throughout the vitreous humor. You can use blue frosting, too, instead of just red frosting.
  5. Surround the entire cake with a black outline, except for the pupil, which is where the light comes into the eye.

You are now finished making your eye model cake. Have fun eating it!
eye-cake

LEGO Human Anatomy

Wednesday, October 28th, 2015

LEGO-human-anatomy

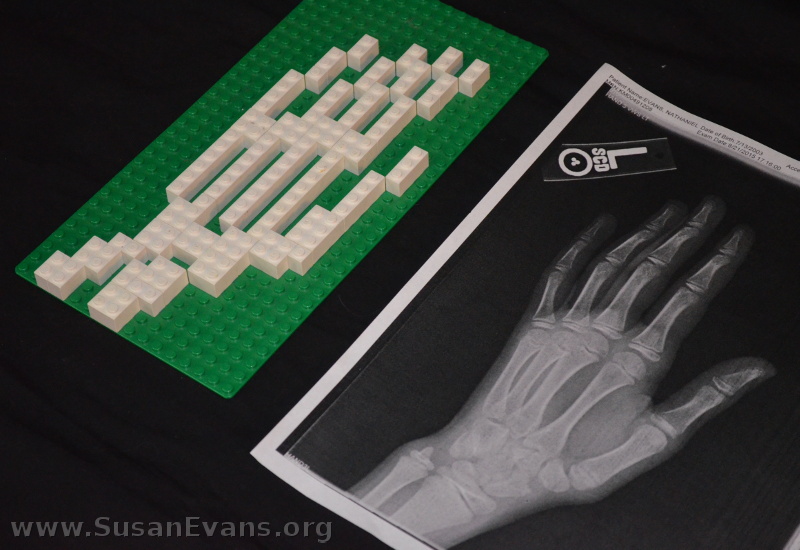
Why not make some LEGO human anatomy models? You can start with the skeletal system, with the bones of the body. One of my sons got into a scooter accident last summer and had to go to the emergency room. Here is his hand x-ray, where we found out that there was only a tiny fracture, not bad enough to get a cast. He said that the pain hurt like the dickens. But alas, there was nothing we could do.

When we started our human anatomy unit study this fall, the first body system we studied was the skeletal system. My son whipped out his hand x-ray and made a LEGO model of his hand with white LEGOs on a green base. It turned out looking pretty cool.

lego-bones

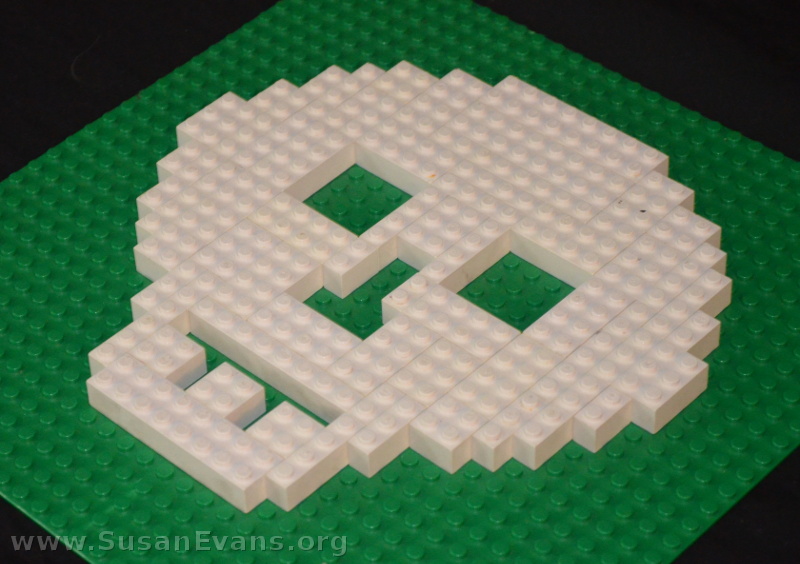
Next he made a skull. No, he didn’t get an x-ray of his skull when he cracked his head on the cement from flipping off his scooter. He didn’t ever get a concussion, so the doctors didn’t bother getting an x-ray of his skull. Instead, my son looked at a picture of a skull (perhaps in the hand of Hamlet), and made a LEGO model of the skull.

lego-skull

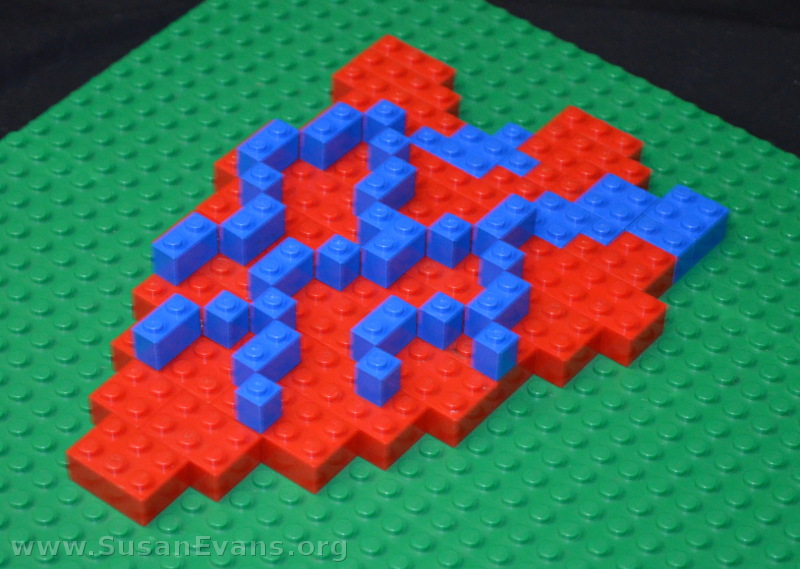
Not to remain in the skeletal system forever, my son decided to make a model of the human heart. He looked at a diagram of the human heart and used red LEGOs to form the general shape. Then he used blue LEGOs for the arteries.

lego-heart

So there you have it. LEGO human anatomy, ladies and gentlemen.

If you want more hands-on activities for human anatomy, join the Unit Study Treasure Vault!

Three-Dimensional Anatomy Poster

Friday, November 12th, 2010

anatomy-poster

Years ago when we studied anatomy, my children made a life-sized poster of each of the systems of the body, one by one as we studied them. The child would lie down on the butcher paper, and we would trace the real body of the child. We usually covered one system a week or one system for two weeks. We colored each system a different color so that we could distinguish which was which. It was a fun project that the children enjoyed.

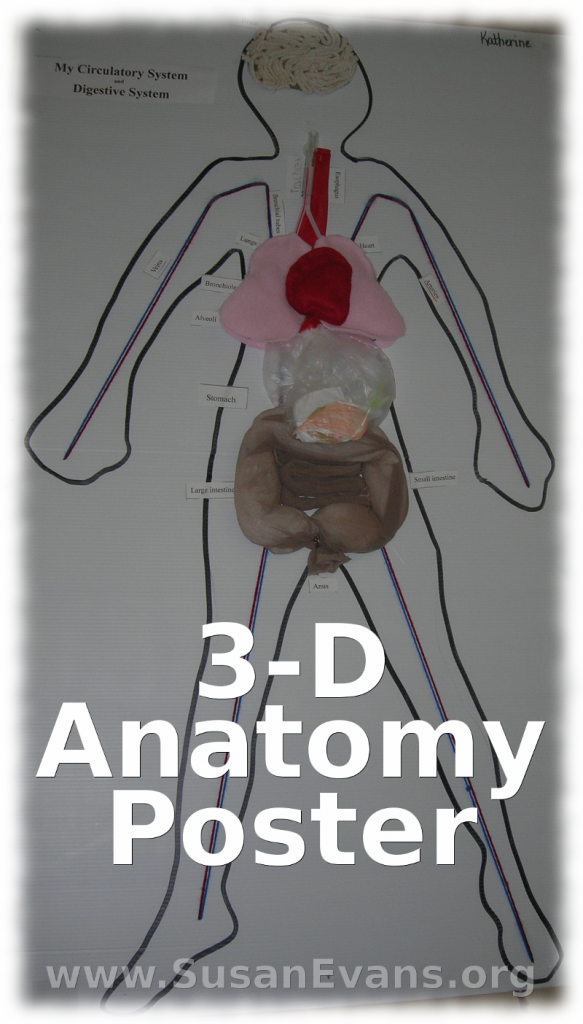
Recently when I went to the state fair with my children, we saw a three-dimensional anatomy poster of two of the systems of the body: the circulatory and digestive systems. The intestine was made of panty-hose, and the stomach was a clear plastic bag with cut-out pictures of food in it. (I like humor in a project occasionally because it adds personality to the artwork.) A drinking straw was the esophagus. The heart, lungs, and trachea were made of felt, and it looked like the child stuffed it and sewed it around the edges. The brain was like the bottom part of an old-fashioned mop. It was really fun to look at!

Anatomy Display (Science Learning Center)

Wednesday, September 15th, 2010

anatomy-display

Since my YouTube video clip about organizing educational bins was highly popular, I thought I’d share another example of an educational display that is a science learning center. The bin that I showed you in the video clip was about anatomy, and here was the science learning center that I set up for my children during that unit.

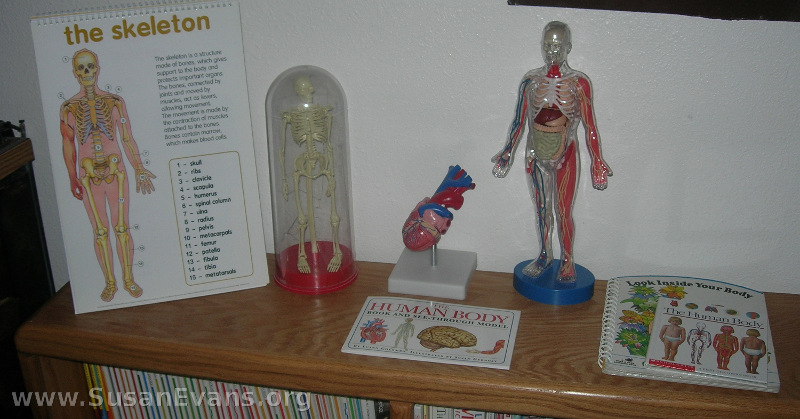
We had several fun books that had clear overlays with each system of the body. I had a skeleton model that I bought for a dollar at a used curriculum sale. The anatomy chart was purchased at a teacher supply store, and it helped the children to learn the different body systems, which they drew, life-sized, of their own bodies traced on butcher paper. The human heart opens up, and you can see the different chambers. This would be good for high school, too, because it was very detailed. I got that at a teacher supply store as well. Let’s see, oh, yeah, we also had a see-through model of the systems of the body. That was kind of frustrating, actually, even though the kids loved it, because it was hard to stuff all the body parts back inside. Anyway, I hope this display is helpful to you as you homeschool your own children and get them excited about learning a specific subject.

If you would like more information on organizing your house to have more joy as you homeschool (and more fun!) feel free to get Organizing for a Fun Homeschool, two one-hour, jam-packed video sessions giving you a tour of my home and how I do things with my children. Many homeschooling mothers have come over to my house over the years, and all of them have taken lots of notes and asked lots of questions. I’ve answered everything in these videos.